Publishing project documentation with Gitlab CICD
GitLab Continuous Integration/Continuous Delivery (CI/CD) allows you to automate the testing and deployment of your programs, plan tasks, produce reports etc. If you are working on a complex software project, it is worth knowing about these facilities as they might help you save some time and improve the quality of your software.
Motivation
This short tutorial is based on a real case scenario encountered during our Distributed Relocatable Collections project. For this project, we have a GitLab runner which compiles and tests our project automatically following the configuration given in the file .gitlab-ci.yml of our project. The development of the library is done on GitLab and we automatically duplicate our master branch on GitHub. We also have a special branch present only on GitHub called gh-pages. This branch is used to generate a small static website for our project which is hosted by GitHub.
We use Maven to compile our project and can generate a report about our project which includes information about dependencies, test coverage, and Javadoc documentation. All these files are generated by running the mvn site command. We could manually upload these reports on GitHub, but these files change constantly as we make progress in our development. Instead, we would like to upload these files to the gh-pages branch of the repository automatically every time changes are made to the master branch.
When we push new commits to branch master in GitLab:
- We want to generate the reporting files of the new
masterhead - We want to record these reports in directory
master-latestin thegh-pagesbranch of our project - We want to commit and push these files to branch
gh-pagesof GitHub
The main difficulty here is that in order to push to a repository, you need an ID and a password. But we CANNOT write such an ID and password explicitly inside the .gitlab-ci.yml file as this file will be publicly available.
Generating an OAUTH “Personal Access Token” in GitHub
First, you need to go to the settings of your GitHub account: https://github.com/settings/tokens.
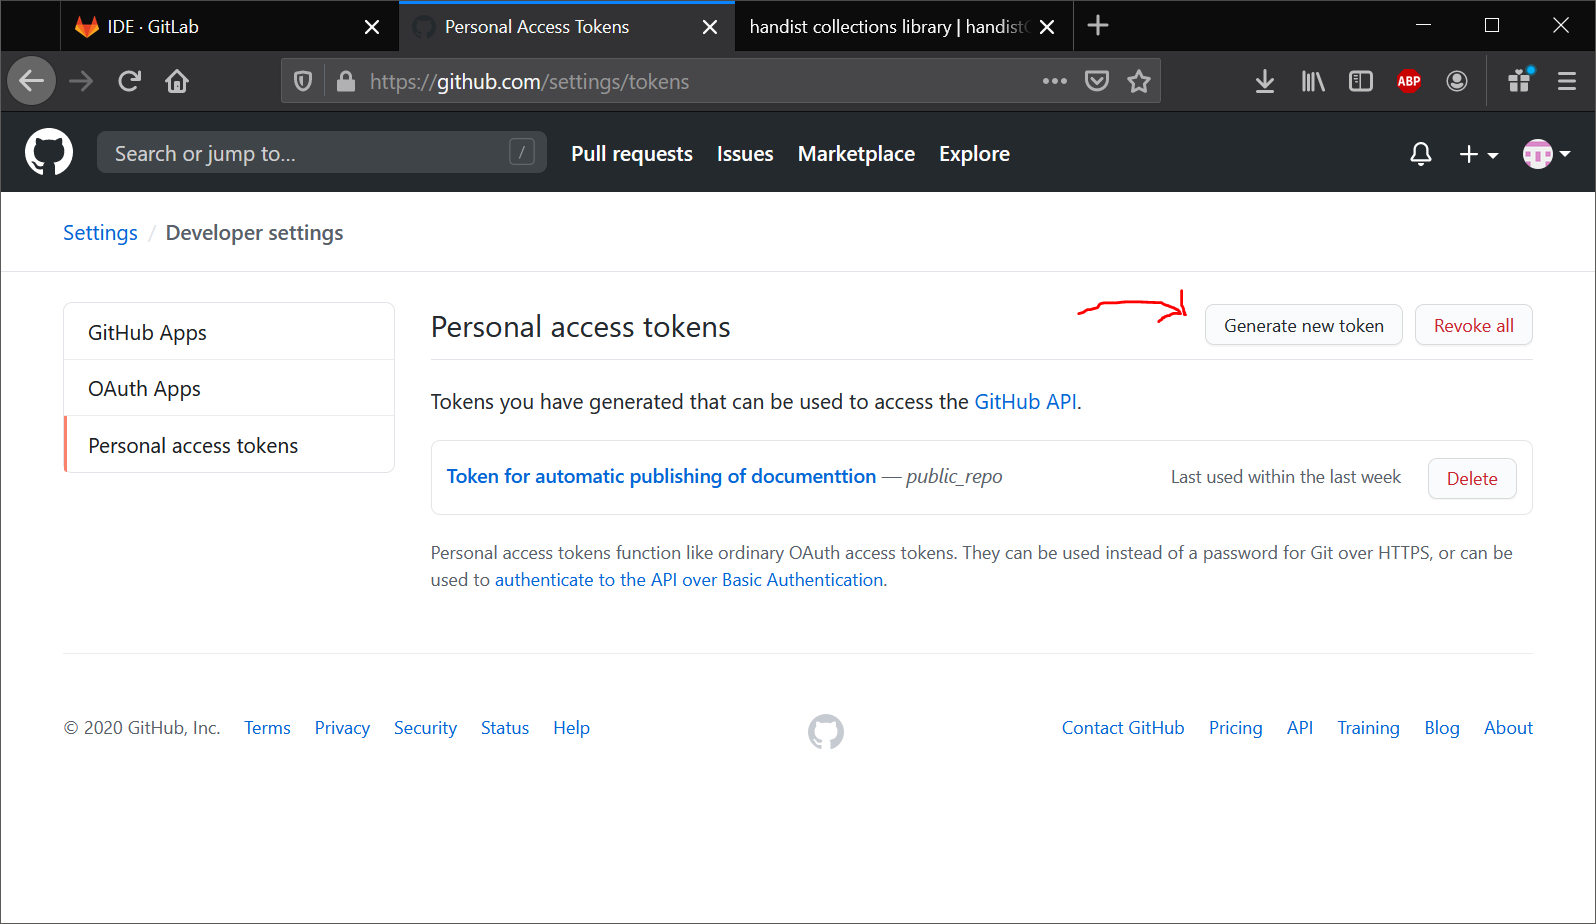
On this page, the list of the tokens you already have are presented (you probably don’t have any). As you can see in snapshot above, I curently have one token listed. To create a new token, click on the “Generate new token” button. You will be asked to enter your password to continue. You will then need to enter a small description of what your token is going to be used for as shown below.
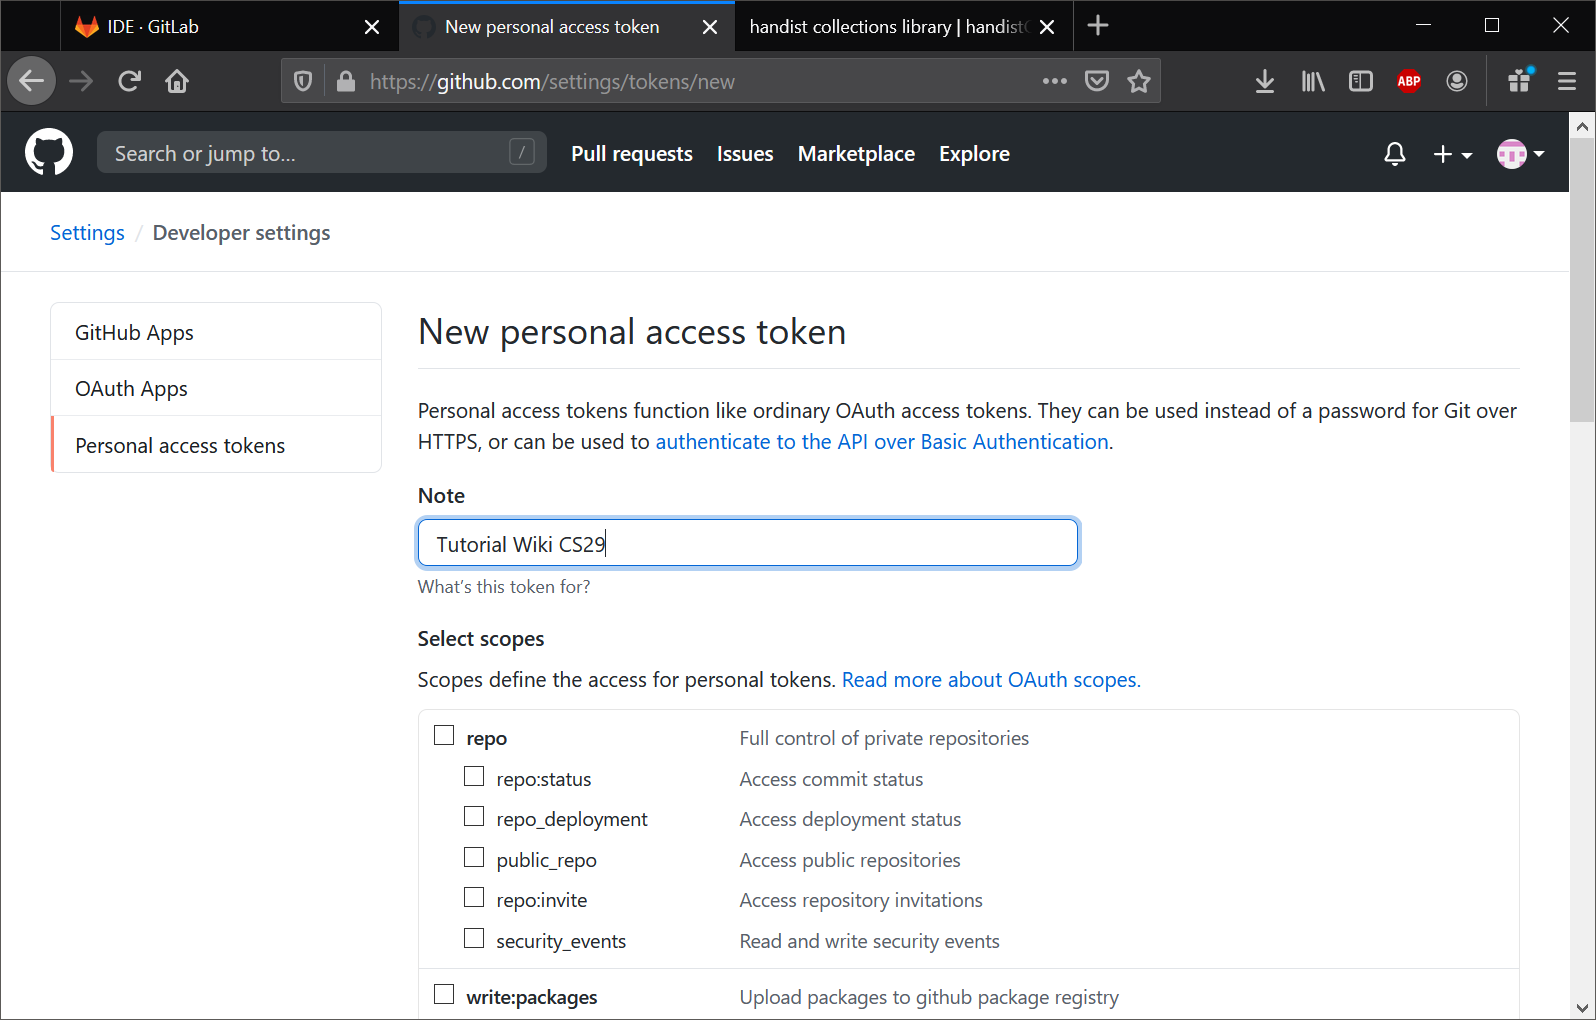
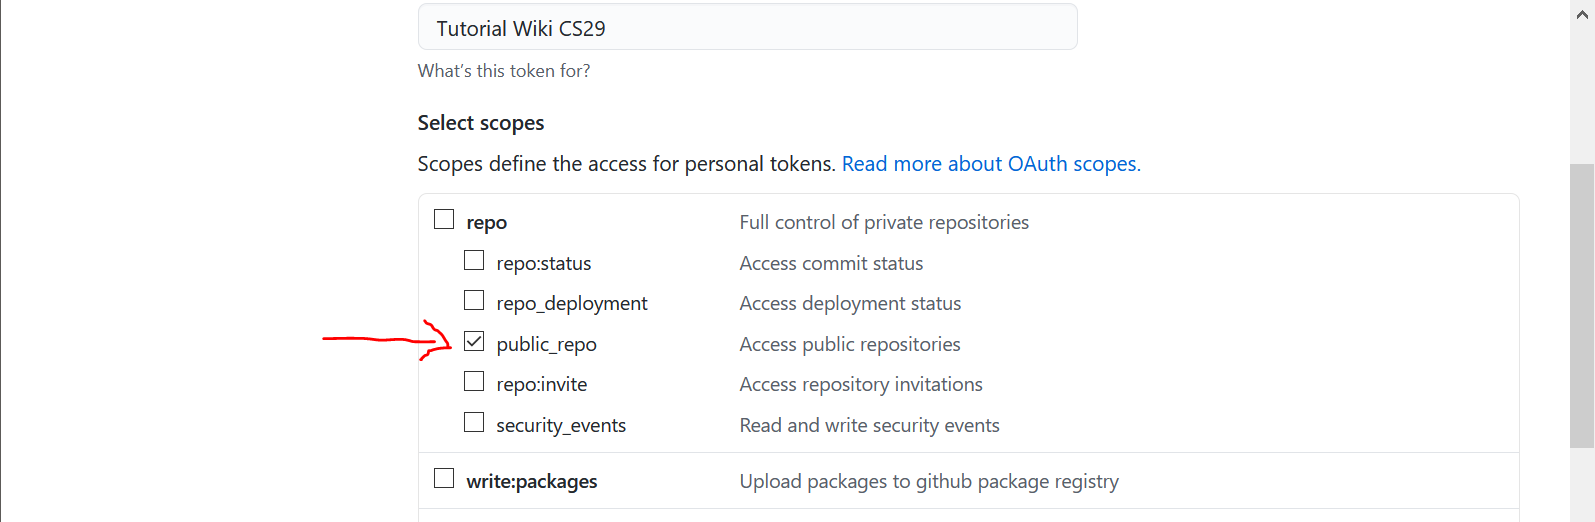
Then, you need to decide which actions are permitted with this token. Check the boxes that you need, and only those. These tokens are a potential security risk. You do not want to give unnecessary accesses. In our case, we want to be able to push to a repository which is public. So we only need to check the public_repo box.
When you have finished selecting the permissions that come with your token, go down the page and click on the green “Generate token” button. This will guide you to a new page with the token visible:
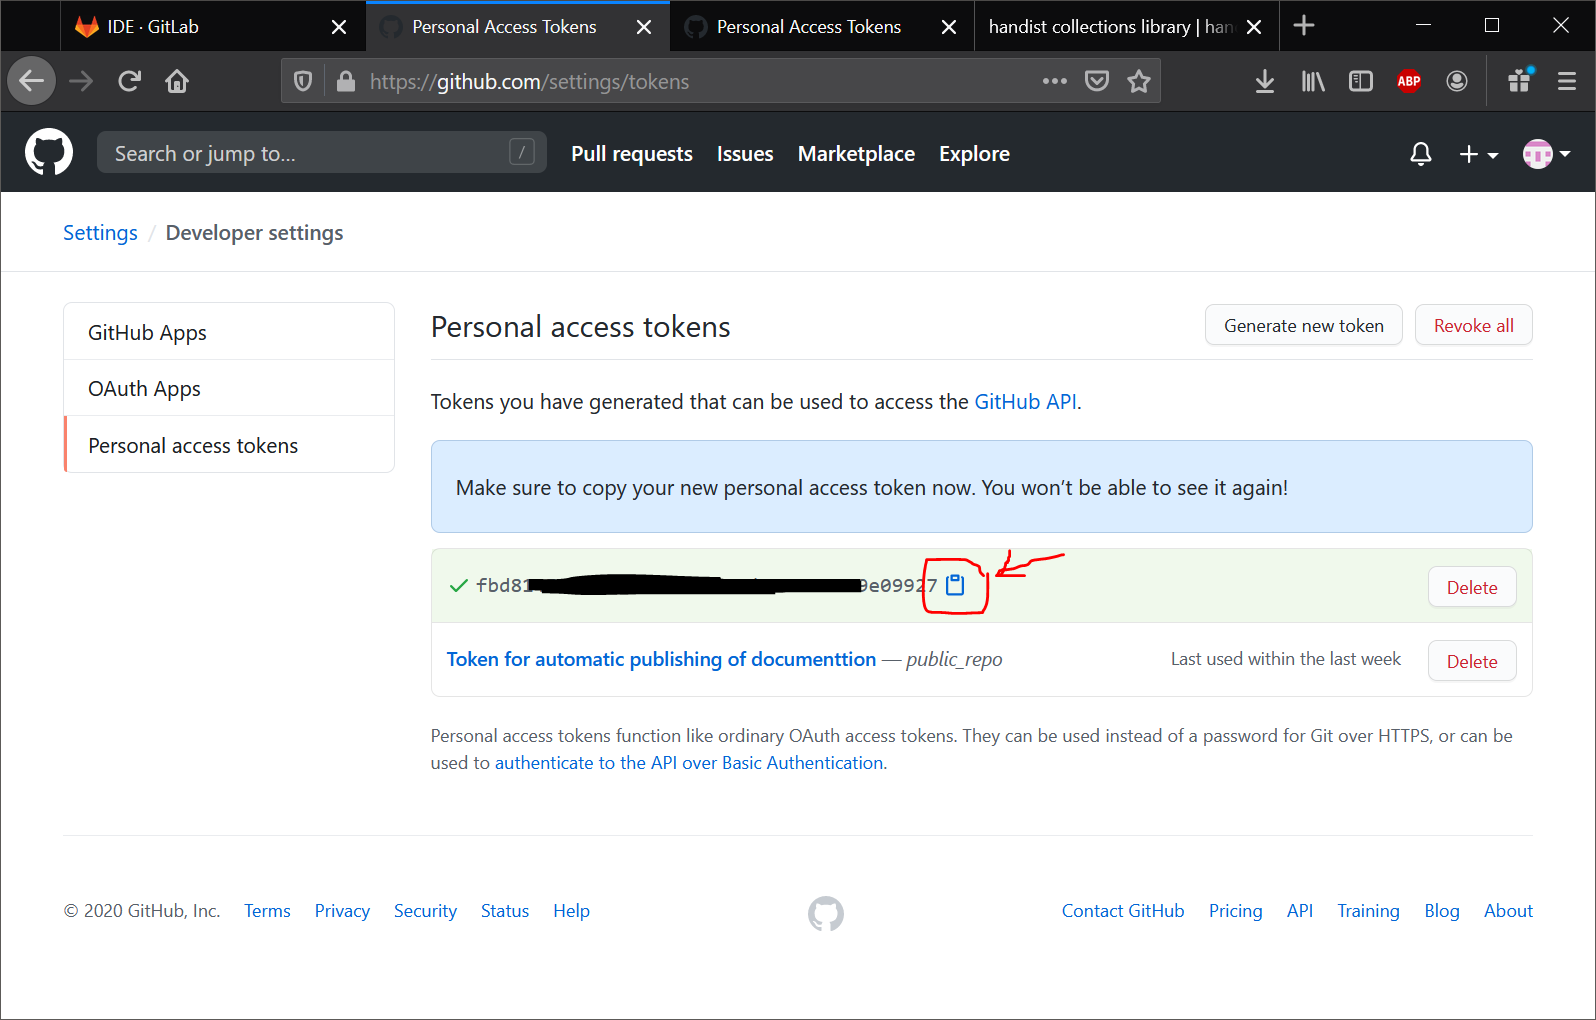
Copy the token to your clipboard. As the warning suggests, this is the only time GitHub will show you the token. You will also receive an email from GitHub informing you of this token creation: [GitHub] A personal access token has been added to your account or something similar.
Adding the Token to your project’s CI variables
Now that you have the generated token, you need to add it to the CI variables of your GitLab project. Doing this will make it possible for you to use the token inside your .gitlab-ci.yml scripts.
Go to your project’s page on Gitlab and go to the Settings -> CICD menu. There, expand the “Variables” section. You are going to create 2 variables:
- one for your Github account name (which I called
GITHUB_USERin the Handist Collections project) - one for the token you just created (which I called
GITHUB_OAUTH).
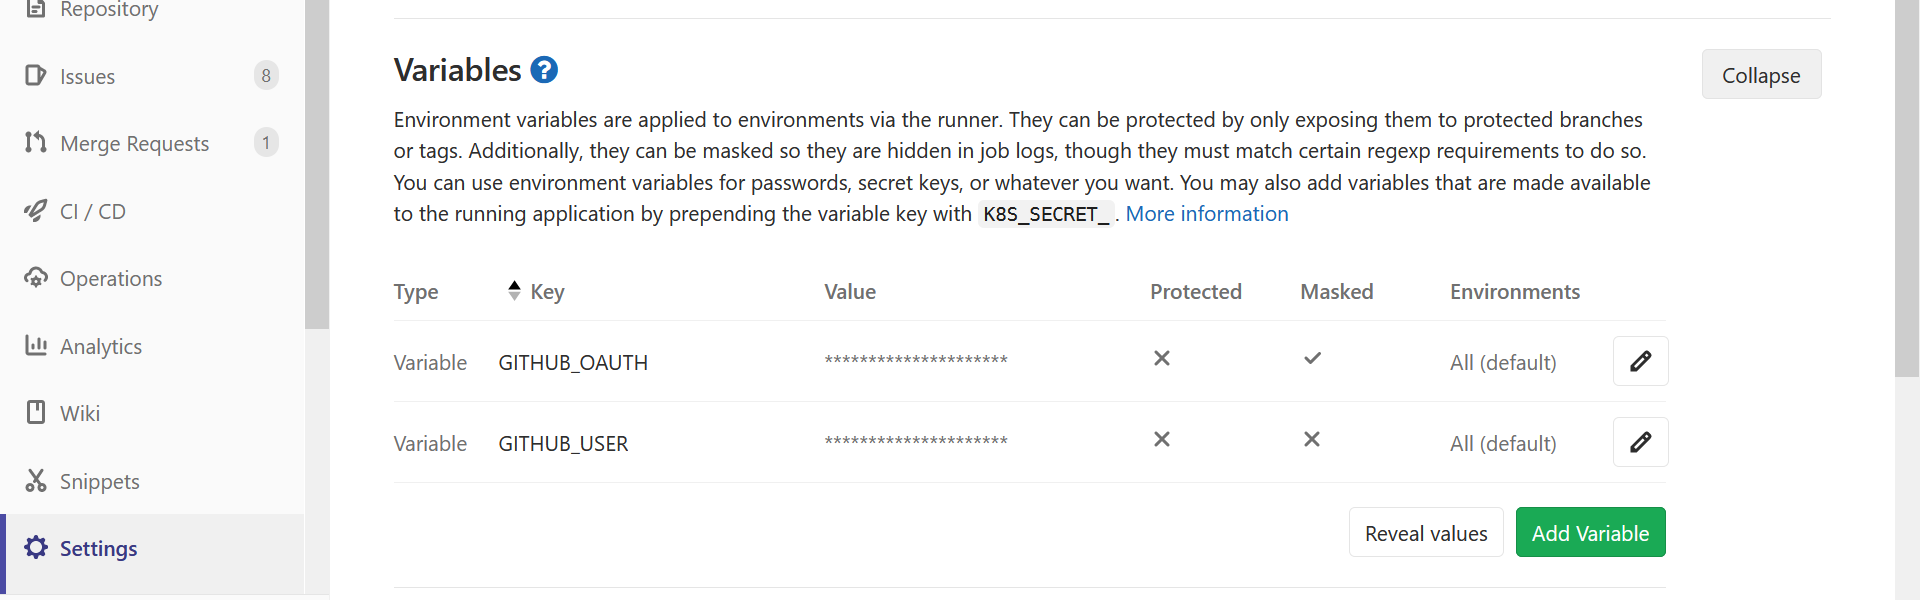
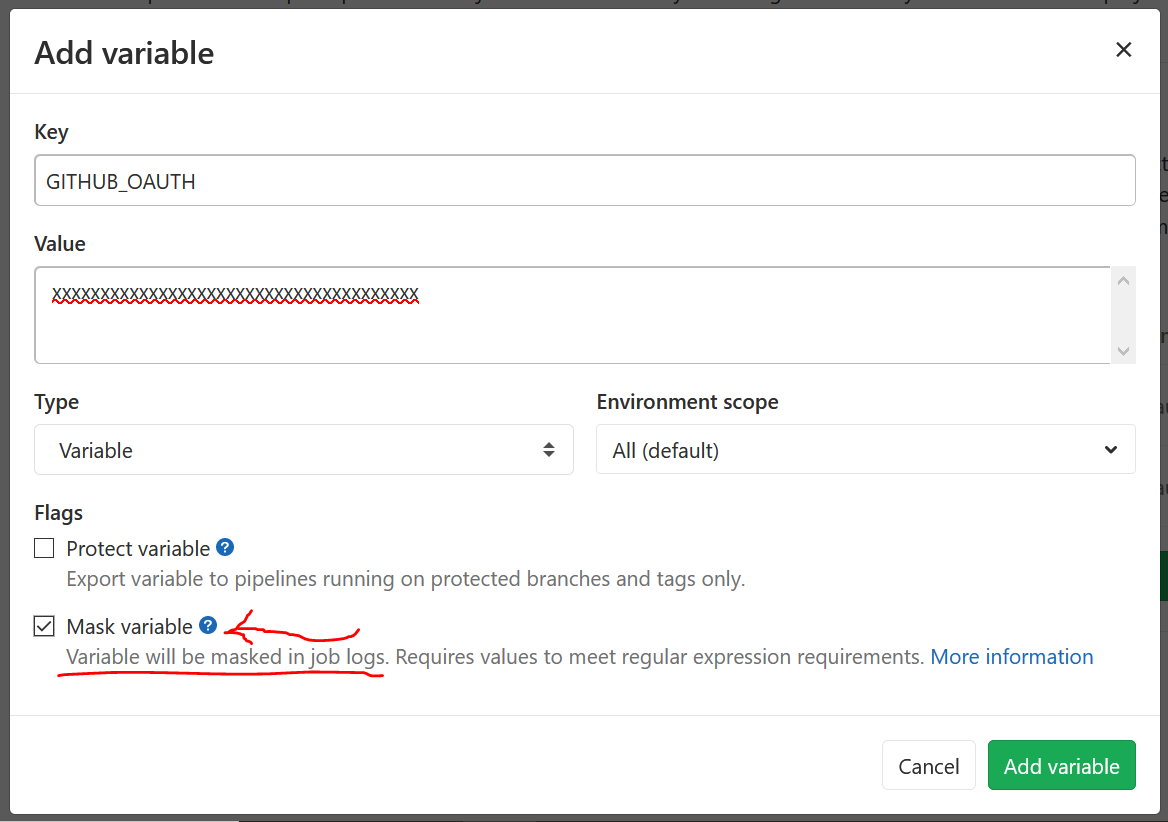
IMPORTANT
When you create the variable containing your token, YOU NEED TO CHECK THE “Mask Variable” BOX. This will prevent your token from leaking in the Job output.
Setting up your .gitlab-ci.yml scripts to use the token
Finally, you can now edit your .gitlab-ci.yml script to generate the files you need, clone your GitHub repository, make the changes you want and push the result. For the purposes of this demonstration, the relevant excerpt of our own .gitlab-ci.yml file is presented below:
publish:
stage: report
script:
- mvn site
- cd target
- git clone --single-branch --branch gh-pages https://github.com/handist/collections.git
- rm -rf collections/master-latest
- mkdir collections/master-latest
- cp -r site/* collections/master-latest/
- cd collections
- git add master-latest
- git commit -m "${CI_COMMIT_MESSAGE}"
- git remote set-url origin https://${GITHUB_USER}:${GITHUB_OAUTH}@github.com/handist/collections.git
- git push origin gh-pages
only:
- master
The job responsible for generating the documents we want is called publish and is part of the report stage. Notice that we only run this particular job on our master branch by specifying only: -master at the end of the job description.
The first two commands source /home/gitlab-runner/.profile and mvn site generate the files we want to upload in the target/site directory. We move into the target directory of our build and clone the gh-pages branch of our GitHub repository. The files we want to update are located in a sub-directory called master-latest. We delete it with all its contents and create it again and copy the files we want to upload to this directory.
Command git add master-latest adds to the git index all the files recursively contained in the master-latest directory. We then commit those files using the CI_COMMIT_MESSAGE variable as a message. This makes the commit to the gh-pages repository match the message of the commit that was made on the master branch.
The git remote set-url origin https://${GITHUB_USER}:${GITHUB_OAUTH}@github.com/handist/handistCollections.git command is where the magic happens. This modifies the remote’s url and integrates the username and password inside of it. When the Runner actually performs this script, the GITHUB_USER and GITHUB_OAUTH variables will be populated with what you entered in the previous step. By integrating the user and the password information in the URL, the git push origin gh-pages command will not prompt for an user/password. The GitLab runner running this script will therefore be able to push on you behalf.
To Go Further
In general, the GitLab documentation is excellent. You can refer to:
- https://docs.gitlab.com/ee/ci/ for information about CI/CD
- https://docs.gitlab.com/runner/ for information about Runners There are of course many other features to GitLab not discussed here.
Another tool related to this project is MPI-JUnit which I created to test our Java library running on top of MPI using the usual JUnit testing framework.
Enjoy Reading This Article?
Here are some more articles you might like to read next: